Solar Street Lamps Installation and construction
Solar street lamps are powered by crystalline silicon solar cells, they have maintenance-free valve-regulated sealed batteries(colloidal batteries or lithium batteries) to store electrical energy. These Ultra-bright LED lamps are used as a light source which is controlled by the intelligent charge and discharge controllers thus replacing the traditional public electric lighting street lamps.
Solar street light powered by the sun which doesn’t require the need for cables and comes with zero electricity charges. It has the advantages of having good stability, long life, high luminous efficiency, ease of installation, and maintenance. Solar light has both economical and practical benefits, it follows high safety standards, operates on higher energy conservation and is environmentally friendly, solar street lamp can widely be used in urban primary and secondary roads, communities, factories, tourist attractions, parking lots, and other places.
Solar street lamp Installation Guidance and Steps:
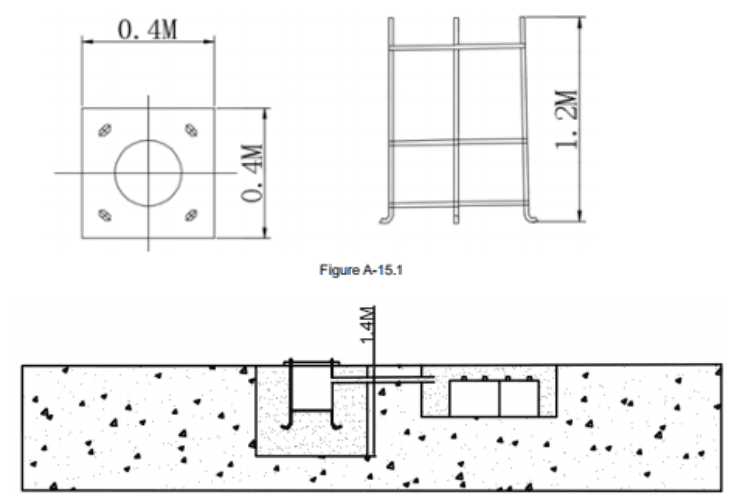
- Dig a foundation pit at a depth of 1.5m from ground zero that has a square opening with a border of 0.8×8M. Put the four-corner foundation cage into the pit, and keep the extended part about 0.1 M above the ground (note that the threaded part should not be damaged). At the same time, insert a pipe with a diameter of 80MM into the foundation pit followed by concrete to get it filled.

- Dig a battery tank foundation at a depth of 0.8-1.0 meters that has an opening of 1.0×0.6 meters around the attachment.
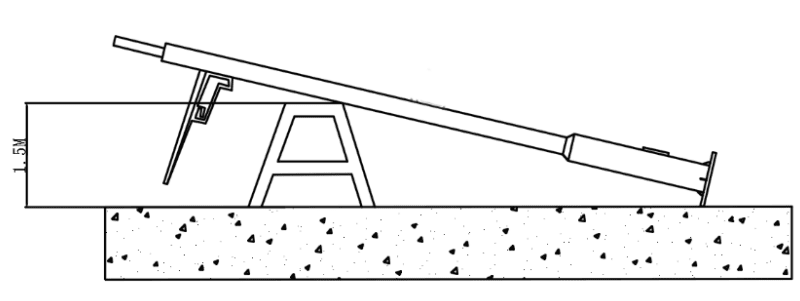
- 4-7 days after the concrete solidifies, prepare to erect the lamp pole
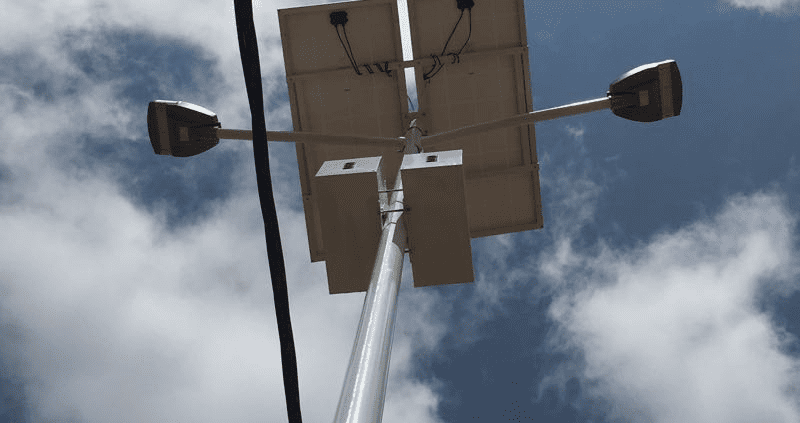
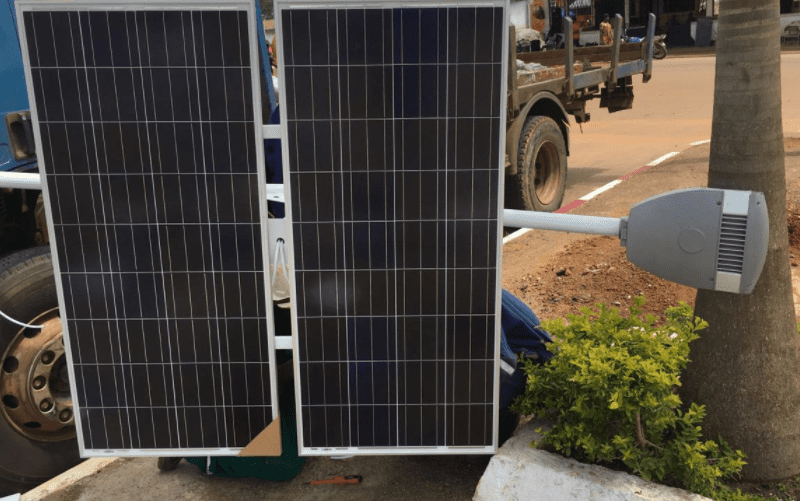
- Install the LED lamp on the lamp arm and fix it with the main lamp post.
- Start threading: Thread the 2.5mm2 wire (one red and one black) from the inner arm and the pole of the LED lamp to the bottom of the lamp pole and then connect it with the output end of the controller.
- Fix the lamp and then fix the arm.
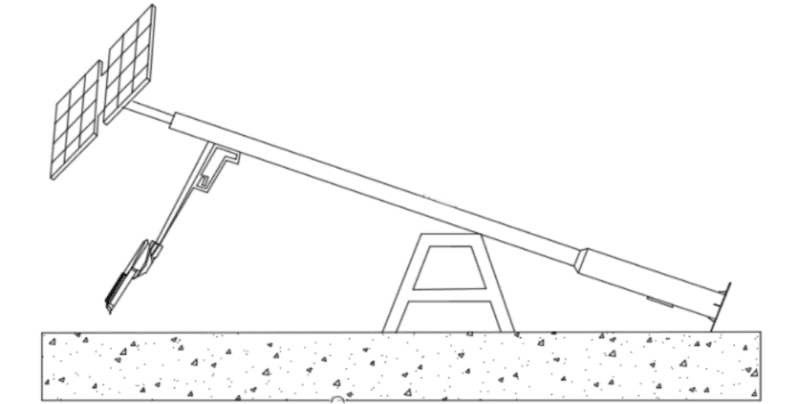
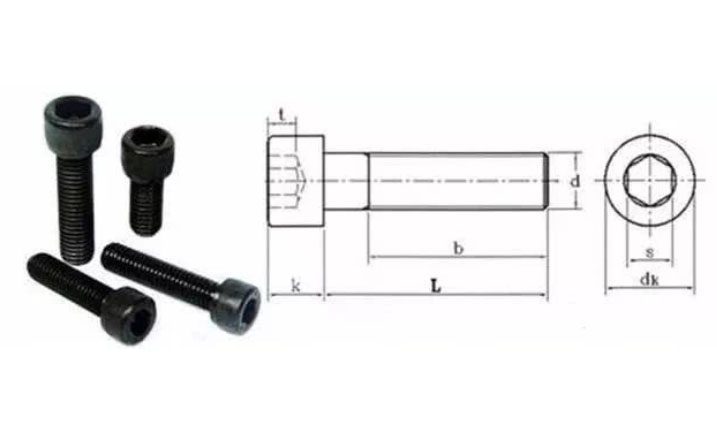
- Fix the cross arm of solar panel bracket with bolts on the main lamp pole.
- Place the solar panel on the bracket frame and then fix the solar panel on the bracket with screws. At the same time, connect the wires from the junction box of the panel and pass them through the battery panel bracket and the cross arm to the lower part of the lamp post.

- Fasten the solar panel bracket to each end of the cross-arm.

- Put the battery into the battery box, pass the wires through the steel wire hose, and fix the bolts and steel wire hose. Place the battery into the battery tank and move the steel wire hose through the pipe of diameter 60-80mm inside the foundation. It is better to keep the steel wire hose above the ground and backfill with soil to level it.
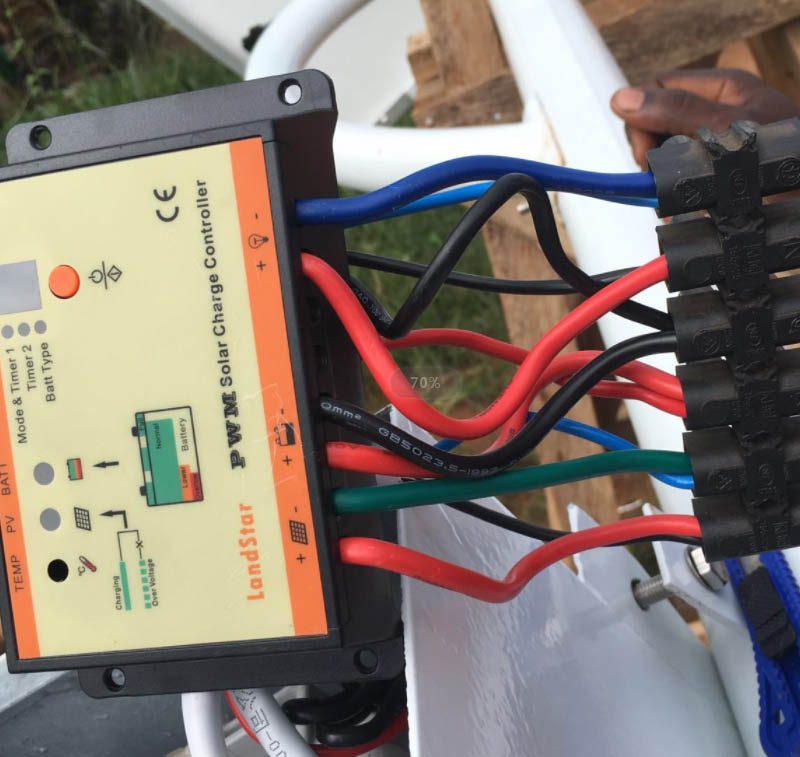
- Controller wiring: Connect to the controller in the order of battery, solar panel and load (note: first “-” then “+” to prevent short circuit);

- The wires on the battery are connected to the fan controller and the solar controller respectively.
- Remove the input line of the solar panel from the solar controller. After about 1 minute, if the bulb turns on normally, it means that the line is connected correctly. Otherwise, the connection is wrong and needs to be checked. Then put the controller into the lamp pole; Erect the lamp post.
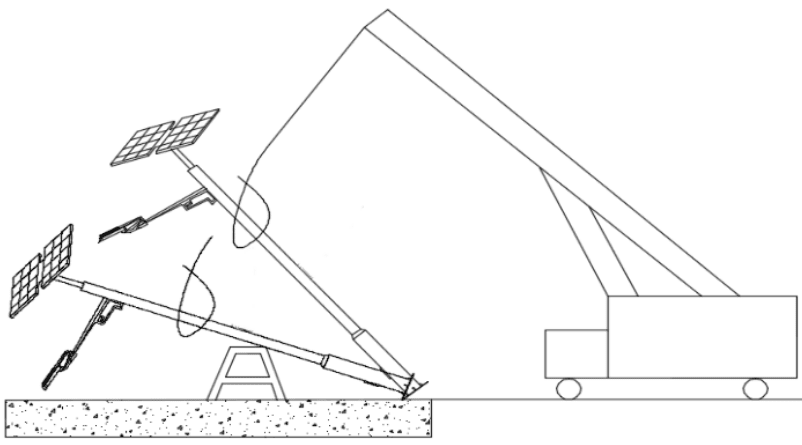
- Use the crane to pull up the lamp pole, align the flange hole of the lamp pole with the embedded part (pay attention to the direction of the lamp), and then fix it with screws.

- Check whether or not the bolts of the lamp post and embedded part are fixed, whether or not the lamp is neat and aligned with the road, and also check whether or not the lamp posts of the complete road is neat, that is to check if all the lamp posts are in a straight line when seen from the first lamp post
- The installation of solar street lamps is basically the same as the installation process of traditional street lamps, but there are some differences, especially the installation of solar panels and batteries. Installation and construction procedure of solar street lamp includes a selection of lamp position, basic prefabrication, installation preparation (battery assembly, panel, and support), lamp pole assembly (thread running, lamp installation, panel technical support installation), hoisting, battery installation, controller installation, lamp pole calibration, acceptance, and handover.